
I remember the first time I put a remote receiver on my Labrador's collar. I felt both hope and doubt. I wanted better recall and safer walks, but I was scared of hurting my dog.
That's why I learned about using dog training collars the right way. I focused on methods that are both humane and effective.
In this guide, I'll share step-by-step methods and safety tips for using dog training collars. We'll talk about remote trainers, e-collars, and different stimulation types. You'll learn how to use them for obedience, recall, and more.
Think of a dog training collar as a long, invisible leash. It can reach up to 1,000 meters. Used right, it helps communicate with your dog, not punish them.
It's important to follow safety and legal guidelines. Always read your manual and follow the manufacturer's advice. Also, check local laws about using these devices.
My advice comes from K9 Electronics and professional trainers. They see e-collars as just one tool. Always follow the manufacturer's instructions for fit and use.
Key Takeaways
- Dog training collars how to use: approach with care, seeing the tool as communication.
- Understand collar types: e-collars, vibration, and tone each have specific roles.
- Mastering dog training collars requires step-by-step testing and the lowest effective level.
- Always follow manufacturer instructions and check regional safety or certification rules.
- Use collars alongside positive training methods and professional guidance when needed.
Why I Recommend Understanding Different Types of Dog Training Collars
I want to help you pick tools that fit your dog and your goals. Choosing the right collar means knowing the options and how they work. This knowledge helps you use training collars safely and fairly.
Overview of collar types
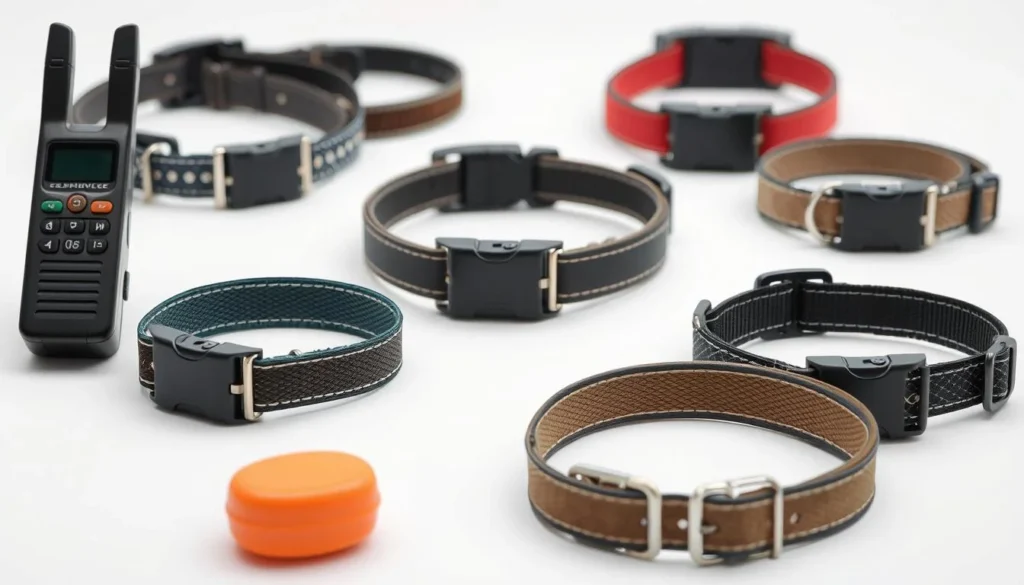
Static or stimulation e-collars have tone, vibration, and static modes. Brands like Garmin and SportDOG offer handheld transmitters with receiver collars for distance work. Vibration-only collars and bark collars interrupt without static for attention or to stop barking.
Remote containment systems, or invisible fences, keep dogs on property. Traditional tools like leashes, slip leads, and Martingale or pinch collars are good for close control and shaping behavior. Learning about these categories helps you use dog training collars effectively.
When an e-collar is appropriate versus other tools
Introduce an e-collar after basic training is solid. This means clear rules, consistent cues, and a strong bond with your dog. Start with reward-based training and add an e-collar for distance work.
An e-collar is useful when a dog ignores mild cues or needs off-leash control for safety. If you manage behavior with a leash, whistle, or rewards, start there. For long-range refinement, the right e-collar can help.
Benefits and limitations for hunting, off-leash recall, and nuisance behaviors
Hunting and advanced field sports benefit from subtle, long-range signals. An e-collar provides a clear interrupt at distance for off-leash recall. Many professionals use a long line with the collar for teaching reliable returns.
For nuisance behaviors like barking, digging, or chasing, e-collars can interrupt quickly. But misuse can confuse or frighten the dog. This can lead to dependence on the collar, undermining the goal of teaching cue-driven behavior.
Quality and design are key for safety and effectiveness. Cheap units may have inconsistent stimulation or harsh pulses. Look for predictable levels, good fit, and reputable brands when choosing the best dog training collars. Practice using them with patience and a plan to fade reliance when the behavior is learned.
Choosing the Best Dog Training Collars for Your Dog
I help owners find the right gear for their dogs. It's all about quality, features, and safety. I look at how well the collars work, not just what they say.
Quality matters: why brand and features matter
Brands like Garmin, SportDOG, and Educator are top choices. They offer strong stimulation and build. Make sure the transmitter range fits your training needs, from small areas to big fields.
Having 100+ stimulation levels is key for precise training. Vibration and tone modes are great for starting out. Waterproof gear is a must for training in wet conditions. Easy-to-read battery indicators and simple controls help avoid mistakes.
Matching collar features to your dog’s size, sensitivity, and activities
Choose the right collar size and type for your dog. Small dogs might do better with vibration or low static. Big dogs might need more power and longer battery life for long training sessions.
If you have more than one dog, look for collars that can handle it. Adjustable straps and light receivers are good for growing puppies. These features help keep training humane and effective.
Safety certifications and regional rules to check
Always read the manual before using a collar. Check if the collar is approved for your area. Some countries have special rules for these devices.
Follow the manufacturer's advice and keep up with updates. Using the right devices helps with safe and effective training. It's important for the well-being of your dog.
How to Fit the Dog Training Collar Properly
I help owners understand the importance of fit and comfort. A correctly sized collar makes training safer and more effective. It prevents slipping, rubbing, and false triggers, helping your dog learn faster.
Where the receiver should sit on the neck and how snug it should be
Position the receiver high on the neck, just below the base of the skull and near the ears. This spot ensures consistent contact and prevents the unit from rotating when your dog moves.
Make sure the collar is snug but not too tight. The one-finger test is a good rule of thumb. You should be able to slip one finger under the collar comfortably. Some brands allow two fingers, so always check the instructions.
How to check contact with the skin and avoid sliding or rubbing
The contact prongs should touch bare skin, not just fur. If your dog has a thick coat, part the hair to ensure full contact. Trimming the prongs or using gel pads can help with sparse coats or sensitive skin.
Check the neck for redness or irritation after the first 10–15 minutes and again after longer sessions. If the receiver rotates or chafes, adjust the collar and use a separate tag collar above it to avoid irritation.
Trimming straps and fitting tips for growing dogs or multi-dog use
Many collars have excess strap length. Trim to leave 3–4 inches for adult dogs. For puppies or growing dogs, leave about 6 inches to adjust as they grow.
Cut the strap into a tapered point for easy threading through buckles. If you use the same unit for multiple dogs, keep spare straps or buckles for each. Re-measure often during growth phases to ensure a proper fit and avoid pressure points.
Here are quick tips for repeat safety and comfort:
- Check fit weekly and after heavy play.
- Keep contact points clean and dry.
- Rotate placement slightly if repeated marks appear.
- Record each dog’s strap length for quick re-fitting.
I share these practical tips because fit and contact are as important as technique. When you combine proper fit with good timing, using dog training collars becomes easier. Your sessions will be safer and more humane.
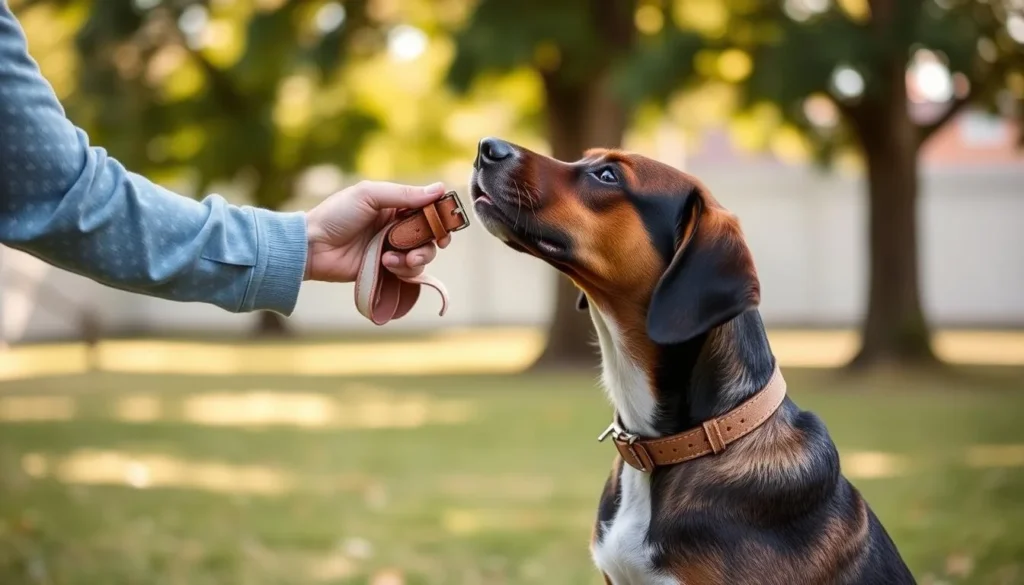
Introducing the Collar to Your Dog and Preventing Collar-Wise Behavior
I start by letting the dog wear the receiver for a few days before I turn it on. This helps them get used to it as normal gear. It's key to using dog training collars safely and calmly.
I keep the first sessions short. Ten to thirty minutes, several times a day, makes them comfortable. Over weeks, I increase the time they wear it. This keeps the experience positive.
I follow a daily routine for the situations I want to change. Many trainers suggest consistent use for four to six months, then easing off. I use the 90% rule: if the collar is present most of the time and used correctly, I can relax its use.
I avoid linking the collar to correction. I start with tone and vibration to link cues to rewards and praise. Then, I reward the dog when it responds before using static stimulation. This method ties feedback to behavior, not the device.
I mix positive markers, treats, and short training games while the collar is worn but inactive. This makes the dog predict good outcomes when the unit is on. When I do use stimulation, I ensure timing is immediate and tied to a clear cue so the dog learns cause and effect.
When training my dog with a collar, I monitor body language closely. If the dog shows stress, I reduce pressure. I adjust fit, try lower settings, or return to tone and reward until comfort returns.
To prevent collar-wise behavior over the long term, I rotate training contexts and pair the device with routine care like leash walks or feeding. These daily pairings make mastering dog training collars part of normal life, not a signal of punishment. Careful introduction and steady positive reinforcement maintain trust while delivering clear communication.
Finding Your Dog’s Recognition Level and Testing Stimulation Safely
I start by introducing tone and vibration before using static stimulation. For 10–15 minutes a day over two to three days, I press the tone button while giving a treat and praise. This teaches my dog that sound or vibration means a reward is coming.
To find the lowest effective static level, I follow a step-by-step routine. First, I make sure the collar and remote are fully charged and working. I put the collar on the dog and let them relax in a familiar room.
I start the remote at zero and tap the stimulation button briefly. Then, I slowly raise the level while watching the dog closely. I look for signs like a head tilt or ear flick to find the recognition level.
When I see a sign, I stop increasing the level and record it. Many experts keep the base level in the low single-digit to low double-digit range.
If the dog shows signs of too much stimulation, I stop right away. If they yelp or jump, I lower the level and pause. I also watch for tense body posture or defensive behaviors.
If I'm unsure, I ask a certified trainer for help. They guide me on the best dog training collar techniques.
After finding the recognition level, I use it as my training baseline. I add tone and vibration cues so the dog knows what to expect. During lessons, I use short, calm tests and give rewards often.
This approach keeps sessions safe and effective. It also helps me test stimulation safely.
Appropriate stimulation makes the dog focus quickly without making a sound. Too much causes yelping or fear. I watch for stress after each session and adjust levels if needed.
This careful process makes finding the recognition level humane and reliable.
Using dog training collars how to use
I see dog training collars as a way to improve communication with dogs. When teaching, I focus on using the collar as a tool for communication, not punishment. This approach builds trust by using clear cues and calm handling.
I start by explaining the collar's purpose and how it should work like a leash. It should guide behavior without making the dog feel ashamed. This method keeps training sessions positive and focused on making choices.
Then, I show how to use the collar for corrections and rewards. For stopping unwanted actions, I use a brief tap. For teaching commands, I use a low signal that stops when the dog responds correctly.
Timing and consistency are key. Corrections should match the action or stop when the dog does the right thing. I keep training sessions short and consistent, using the same cues and body language. If I miss a correction, I don't punish later. Instead, I change the situation and retrain.
Regular use of the collar in target situations is important for weeks as needed. Then, I reduce its use when the dog is reliable. Effective use of dog training collars means consistent practice, measured stimulation, and respect for the dog's comfort and learning pace.
Step-by-Step Guide for Dog Training Collars in Basic Commands
I guide you through simple steps for training your dog with a collar. These steps focus on safety, timing, and using the collar as a tool. I keep training sessions short and positive to help your dog learn quickly and stay confident.
First, I check if the collar fits and is comfortable. I put a non-metallic collar above the receiver to ensure it touches the skin without any issues. I attach a leash and hold the remote in one hand to control and time everything correctly.
Teaching sit with collar assistance and leash safety
I help the dog get into the sit position while using a low level on the collar. I say “SIT” as soon as the dog starts to sit down. Then, I release the stimulation when the dog's rear touches the ground. I praise and treat them right away.
I keep the leash loose. I don't force the dog into the sit position. If the dog resists, I lower the level or go back to using tone or vibration. I want the dog to want to sit, not fight against it.
Reinforcing recall with come using momentary stimulation
For recall, I use a long line. When the dog moves away, I give a quick, momentary stimulation at a low level and say “COME.” I stop the stimulation as soon as the dog turns back and start praising and treating them when they arrive.
I increase the distance and distractions as the dog gets better. If needed, I hold steady stimulation and guide with the line until the dog moves back. I stop the stimulation the moment the dog heads back to me, linking movement with release and reward.
Teaching stay and heel with clear timing and release of stimulation
For stay, I place the dog on a spot and stay within three feet. I avoid extra commands unless the dog tries to leave. If the dog leaves, I tap the stimulation and say “STAY,” holding until they return. Then, I release and reward them after a few seconds of calm.
For heel, I keep the leash short so the dog walks beside me. If the dog drifts, I give a momentary stimulation and say “HEEL,” gently guiding them back into position. Then, I release and reward them when they return to my side.
I gradually reduce the collar's use as the dog learns. I switch to tone or vibration, then to voice-only rewards. I keep training sessions short and celebrate correct responses to keep the dog motivated and learning basic commands with e-collar support.
| Command | Initial Tool | Stimulation Type | Timing Rule | Reward |
|---|---|---|---|---|
| Sit | Leash + collar with flat collar above receiver | Recognition level, held until sit begins | Say “SIT” immediately, release at sit | Praise and treat on sit |
| Come | Long line + collar | Momentary stimulation at recognition | Say “COME” as stimulation delivered, release as dog moves toward you | Praise and high-value treat on arrival |
| Stay | Short distance supervision + collar | Tap stimulation if dog leaves | Say “STAY” when correcting, hold until dog returns | Release then reward after steady stay |
| Heel | Short leash + collar | Momentary stimulation for drifting | Say “HEEL” with stimulation, release when dog returns to side | Treat or praise for correct position |
Using Dog Training Collar Techniques to Stop Unwanted Behaviors
Many ask how to stop unwanted behaviors without confusing dogs. I use simple dog training collar techniques. These techniques pair a clear cue with a brief response. My aim is to teach a better behavior, not to punish.
Stopping jumping:
I start with the dog on a leash or close by. When they jump, I use a slight shock and say “SIT.” I stop the shock as soon as they sit and reward them. If they ignore the cue, I increase the level slightly and repeat.
Controlling digging:
I wait until the dog starts digging. I apply a brief shock at a level just above recognition when they start. I stop the shock as soon as they stop digging. I also make changes to the yard to reduce digging.
Managing chasing cars and people:
I ensure the dog knows “COME” well before practicing with a friend on a bike or jogging. I use a long line and a recognition-level shock during drills. If a chase happens, I prioritize safety and return to controlled training.
Addressing excessive barking:
I use a quiet cue with a shock level just above recognition for barking. I praise them when they stop barking. For dogs left alone, I consider bark collars but use them carefully and follow local rules.
I focus on stopping unwanted behaviors while teaching calm alternatives. Consistency, timing, and proper fit are key. Short, positive sessions lead to better results and stronger recall.
Practical Tips for Using Dog Training Collars Effectively
I keep things simple to keep training sessions safe and calm. Always charge the collar and remote before you start. Make sure to remove them when they're fully charged to avoid damage.
Watch for low-battery signals and keep the plugs in to keep them waterproof. This helps prevent any issues.
Turn off the devices after each use. Test the collar in your hand before putting it on your dog. This ensures it's working right.
Clean the contact points weekly and check your dog's neck for any signs of irritation. This simple care makes training safer and more effective.
I carry the remote on a belt clip or fanny pack for easy access. Avoid wearing it around your neck to prevent it from bouncing. Practice using the buttons until you can do it by feel.
Use small adjustments to the levels so you can change them quickly without looking. This helps you stay focused on your dog.
If you accidentally raise the level too high, lower it right away. If your dog reacts strongly, take a break, call them in, and lower the level. This helps your dog trust you and feel safe.
Remember, dog training collars are just one part of training. Start with positive steps and teach impulse control before using the collar. Working with a trainer is also a good idea, especially for complex issues.
Here's a quick guide I use to keep training sessions effective and kind.
| Task | My Routine | Why it matters |
|---|---|---|
| Charging | Charge before sessions, remove at full, watch amber low light | Preserves battery life and avoids mid-session failure |
| Pre-fit test | Vibrate or tone test in hand before putting collar on | Confirms function and avoids surprises for the dog |
| Remote carry | Belt clip or fanny pack, practice by feel | Quick access keeps timing accurate during training |
| Level handling | Increase briefly only, return to base recognition level | Prevents accidental desensitization and maintains clear cues |
| Over-correction response | Lower level, call in calmly, short pet, resume | Reduces stress and maintains trust with the dog |
| Professional help | Start under supervision or enroll in coaching | Teaches safe application and integrates non-aversive methods |
For anyone learning to use dog training collars, keep sessions short and focused. Take notes after each session. This helps you learn patterns and use less stimulation over time.
If you're unsure or have a reactive or fearful dog, get help from a trainer. They can teach you balanced methods. This approach improves results and keeps your dog's well-being first.
Conclusion
I've shared the key points for using dog training collars effectively. They should be tools for clear communication, not punishment. Make sure the collar fits right and test it out.
Start with tone and vibration, then move to static stimulation if needed. This approach helps stop bad behaviors and encourages good ones.
Remember, building a strong bond with your dog is more important than using a collar. Let your dog get used to the collar without it being on. Use the least amount of stimulation needed and follow the rules.
Timing and consistency are crucial. This way, your dog learns to associate the cue with the action you want. Keep the collar in good shape and follow the manufacturer's advice.
If you hit a roadblock or see risky behavior, consider getting help from a professional trainer. With the right approach, dog training collars can make life better for both you and your dog.