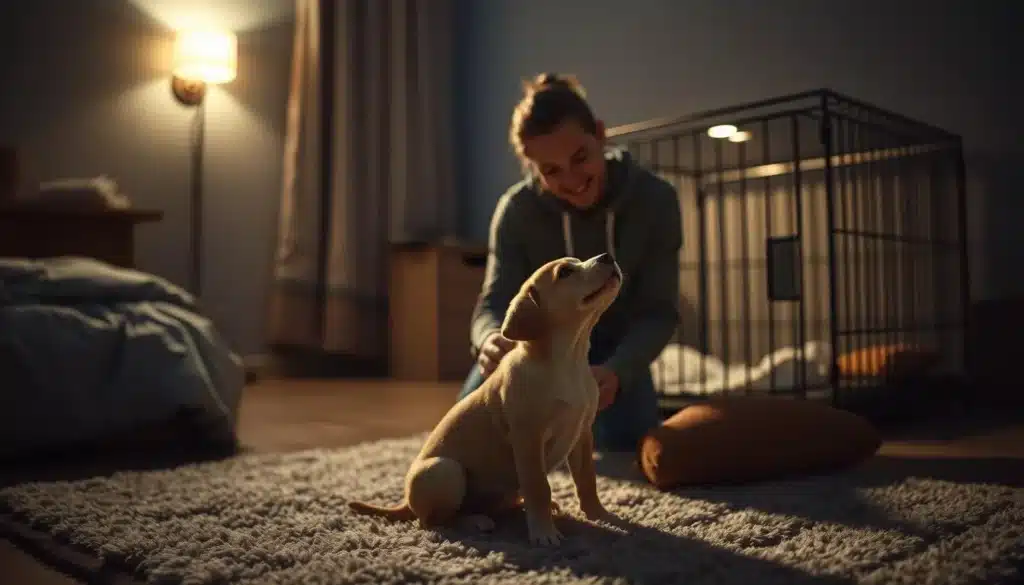
I remember the first time my Labrador, Rosie, froze at my feet when I clicked a small plastic box. That sound cut through the kitchen noise and felt like a secret handshake. Over dozens of short sessions, I learned that the dog clicker training sound can make choices clear. The magic was in tiny, precise moments repeated with kindness.
If you're new to this, think of this guide as a friendly road map. I'll show you simple steps for dog clicker training for beginners. We'll start with charging the clicker and then phasing it out while keeping rewards meaningful. I also share practical tips for when videos won't load, like enabling JavaScript or trying another browser.
My goal is to help you build trust and clarity fast. With short sessions, tasty treats like deli turkey, and a focus on timing, you'll see how quickly a click can mark success. Precision is key, but small errors won't stop progress. Consistency and thoughtful reinforcement will keep you moving forward.
Key Takeaways
- Click marks the exact behavior you want; pair it immediately with a reward.
- Start with short, frequent sessions to keep learning fast and fun.
- Use high-value, tiny treats and non-food rewards when needed to avoid weight gain.
- Film or review sessions and set up the environment for success to avoid trainer errors.
- Ensure online training videos play by enabling JavaScript or switching browsers.
What is clicker training and why it works
Clicker training is a clear, fast way to teach dogs new behaviors. It relies on a precise marker to help a dog understand which action earned a reward. This method is essential for any dog clicker training guide.
I use the clicker to mark the exact instant a dog performs the desired action. The sound is distinct and repeatable. Dogs learn to link it with a treat or praise. Once paired, the dog offers the behavior more often.
How the clicker marks behavior
The clicker creates a crisp, consistent signal. I click at the precise millisecond the behavior occurs, then deliver a reward right away. This tight timing bridges the gap between action and consequence, speeding learning.
Positive reinforcement basics and supporting science
Positive reinforcement means giving something the dog values after a correct response. I use small, high-value treats or a quick play burst. Research shows animals learn fastest when actions are immediately followed by rewards.
When to phase out the clicker and keep rewards
Once a behavior is reliable, I begin to fade the clicker. I keep rewards plentiful at first, then move to intermittent reinforcement. The clicker becomes optional as the cue, context, and consistent timing carry the message.
I film some sessions to spot timing errors and remove distractions. I arrange the training area to favor the desired response and use short sessions. This handler-focused work combines with the clicker's precision to make training efficient and humane.
| Training Step | What I Do | Why It Helps |
|---|---|---|
| Charge the clicker | Click then reward several times so the dog links the sound to food or play | Creates a clear association between the dog clicker training sound and reinforcement |
| Mark the behavior | Click the instant the dog performs the target action, then treat | Pinpoints the exact moment that earned the reward |
| Reinforce often | Use small treats and short sessions with many successes | High reinforcement rates speed learning and build confidence |
| Fade the clicker | Gradually reduce clicks and move to intermittent rewards | Shifts control from the tool to the cue and the handler |
| Troubleshoot | Film sessions, simplify criteria, rearrange antecedents | Helps identify timing errors and environmental distractions |
Getting started with dog clicker training for beginners
I guide you through the first steps to start with confidence. Before watching videos, remember that many need JavaScript. If a video won't play, try enabling JavaScript, disabling ad blockers, or switching browsers.
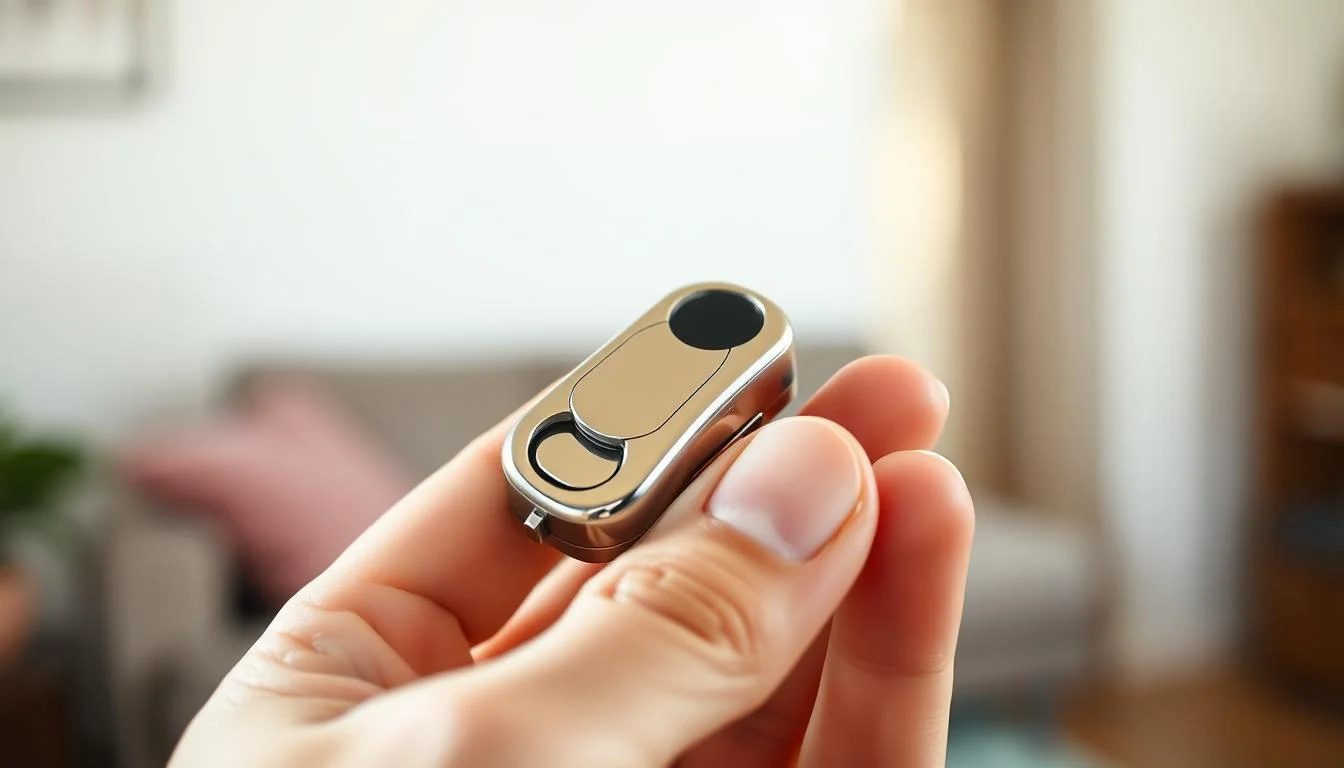
Choosing the right clicker and treats for initial conditioning
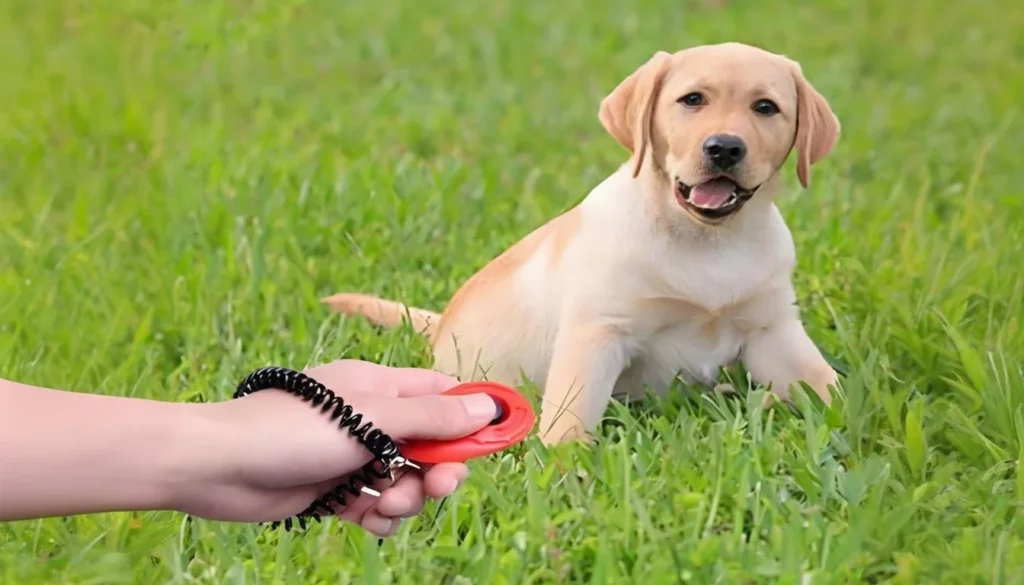
Choose a small, handheld clicker that's easy to hold and makes a clear sound. Brands like Starmark and PetSafe have simple, reliable options. Look for a click that's loud enough to hear from a short distance without scaring your dog.
For treats, use small, tasty pieces to keep your dog interested without getting full. Deli turkey, cooked chicken, or hotdog bits work well. If your dog likes toys, use them as rewards after the click.
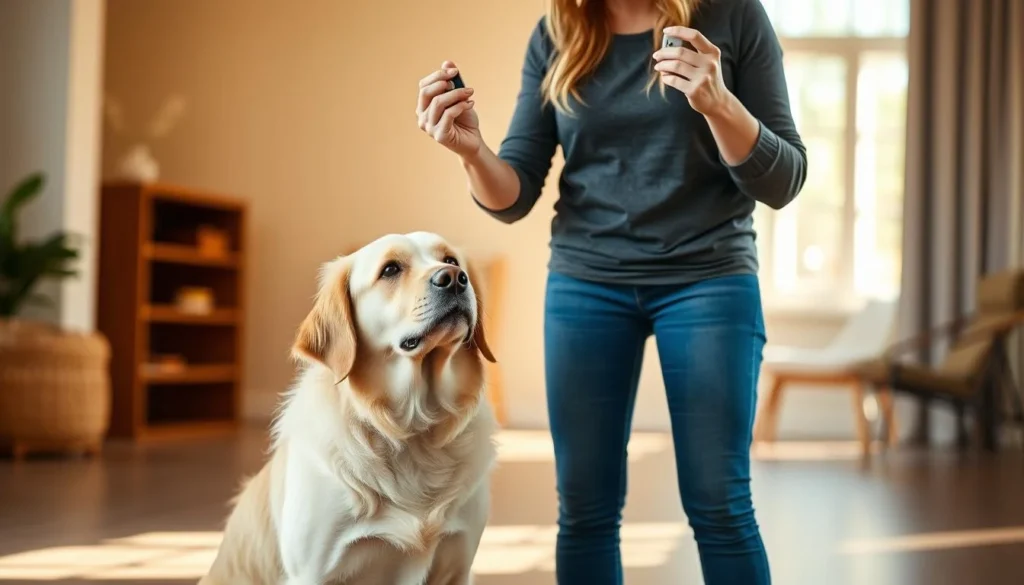
How to charge the clicker so your dog understands the sound
Teach your dog that the click means a treat is coming. Click, then give a treat right away. Do this many times in short sessions until your dog looks for the treat after hearing the click.
Try for at least 10 clear pairings per session. Spread these out over several short sessions to keep your dog interested. Once your dog knows the click means food, you're ready to teach behaviors like sitting.
Short-session strategy and keeping training fun
Keep training sessions short, 30–60 seconds. Use a timer to keep them focused and end on a positive note. This keeps your dog motivated and interested.
Early on, use a high click-to-treat rate. This keeps your dog engaged. Film or journal your sessions to track progress and spot mistakes. Short, focused sessions help your dog learn quickly and stay excited about training.
| Focus | Action | Why it helps |
|---|---|---|
| Clicker choice | Pick a small, loud clicker comfortable to hold | Clear sound marks behavior reliably across rooms |
| Treat selection | Use tiny, high-value food pieces or quick toy play | Prevents early satiety and keeps motivation high |
| Charging | Click then treat repeatedly (10+ pairings) | Creates a consistent sound–reward link |
| Session length | 30–60 second training bursts with breaks | Maintains attention and reduces frustration |
| Reinforcement rate | High early: 10–20 clicks/treats per minute | Faster learning, stronger association for sit and more cues |
| Record keeping | Film or journal short sessions | Reveals beginner errors and tracks progress |
Preparing your environment for successful sessions
I set the stage before I click. A calm, predictable space helps a dog learn faster. It keeps sessions short and productive. I cover three practical areas: arranging antecedents, choosing locations and times, and recording progress with notes and video.
Antecedent arrangement: remove distractions and set up props
I define antecedent arrangement as shaping the room for the dog. I train in a quiet room away from windows and other animals. I remove tempting items like shoes and toys that might break focus.
I place a mat or platform where I want the dog to station. I stand beside the mat so my body naturally guides the dog onto it. I use props like low platforms and target markers to make correct positioning obvious. After I click, I often toss a treat away to reset the dog for the next rep, which helps with recalls and speed of repetition.
Best locations and timing for focused practice
I pick low-distraction locations for initial learning: a quiet living room or a fenced yard works best. I avoid busy parks until the dog generalizes the cue. I keep sessions brief and frequent, aiming for several two- to five-minute drills rather than one long run.
I time practice for when the dog is alert but not overexcited or exhausted. I avoid right after a large meal. Short, well-timed sessions make progress steady and enjoyable for both of us.
Using a training journal or video to track progress
I film every session to spot handler errors and distractions. Watching replay shows patterns I would not notice live. If a video stalls, I check that JavaScript is enabled, disable ad blockers, or switch browsers so online dog clicker training video examples load properly.
I keep a training journal with clear entries: session goals, criteria used, reinforcer type, click-to-treat rate, and session length. I note successes and places to simplify criteria. Reviewing video together with my log helps me set the next goal and adjust the environment or pace for better results.
I use resources like a dog clicker training guide when planning sessions. I study quality dog clicker training video demos to refine timing and body language. This routine keeps progress measurable and prevents avoidable setbacks.
Teaching basic cues with a clicker: sit, stay, and recall
I start by setting a calm space and a handful of tiny, tasty treats. My goal is clear: teach reliable cues using short, frequent wins so a dog learns quickly with positive feedback. This approach works well for dog clicker training for beginners and scales to more advanced practice.
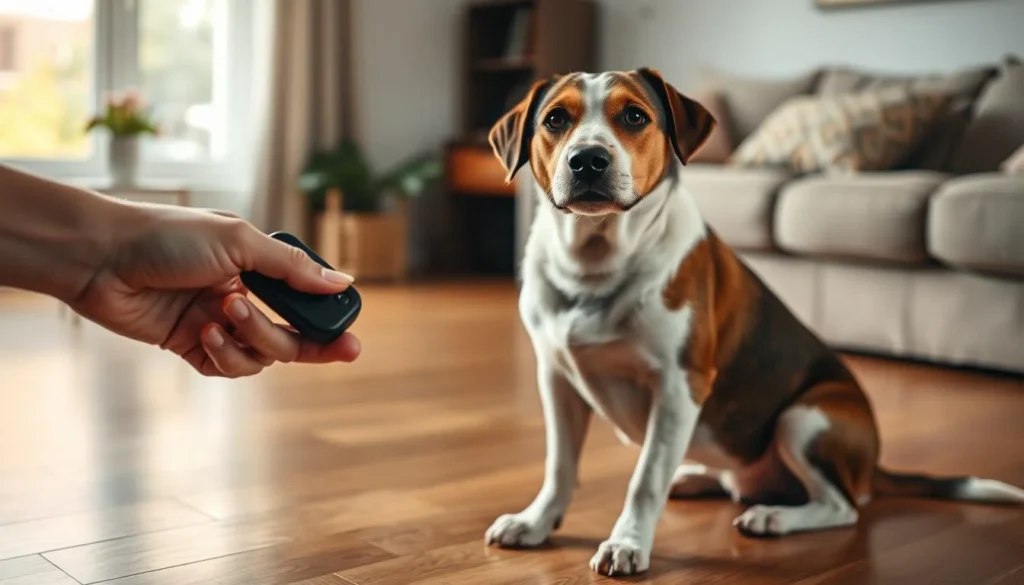
How I capture a natural sit: I wait until the dog offers a sit on its own, click the instant the rear touches the floor, then give a reward. Click, then treat as two separate steps. I repeat this about ten times before I say the verbal cue “sit” just before the dog sits. That builds a strong link between the sound, the action, and the word.
I also use a lure when capturing fails. I hold a small treat at the dog’s nose and lift it slowly along the skull line so the head tilts back and the hips lower. When the dog sits, I click and reward. If the dog jumps, I lower the hand. If the dog backs away, I work near a corner to prevent retreat.
Shaping and slice-thin progressions help with tricky moves. I break goals into tiny micro-steps and reward each small success. For a pivot, I praise tiny rear-paw shifts. For sit, I reward the first slight descent, then a deeper drop. This slice-thin method keeps the dog engaged and confident.
To build duration on stay, I start with very short holds—one or two seconds—and reward heavily. I raise the time in tiny increments only after the dog succeeds several times. I follow the Three D’s: minimal distractions first, then longer holds, and finally adding distance. High reinforcement rates early prevent frustration and speed learning.
For recall work I pair a cheerful click and treat with coming promptly. I keep sessions short and fun, mixing sit, stay, and recall so the dog generalizes cues across contexts. These steps form a strong foundation for ongoing dog clicker training and make dog clicker training sit a reliable command in everyday life.
dog clicker training for barking and other nuisance behaviors
I guide you through steps to stop a dog from barking at windows, delivery drivers, or other dogs. The goal is to stop the unwanted behavior by changing the environment and teaching a new action. This method combines changing the environment with precise clicker training for steady progress.
Identifying triggers and rearranging antecedents
I start by listing what triggers the barking, like doorbells or other dogs. Then, I try to remove or reduce these triggers. For example, I close curtains or block windows with a pet gate.
When removing triggers isn't possible, I change the setup instead. I move the dog to a quieter room or give them a mat with a chew toy before a trigger. This helps teach a new behavior instead of reinforcing the old one.
Clicker strategies to reinforce alternative behaviors
I teach a new behavior like "quiet" or "go to mat." I reward small successes, like a second of silence or a glance. This makes the dog feel successful often.
For dogs that don't like treats, I use toys or praise. I give rewards right after the click and keep them small. I also reinforce calm behavior before triggers to practice it more.
When to seek professional behavioral help
I suggest getting professional help if the barking is severe or long-lasting. A certified trainer or vet behaviorist can check for anxiety or medical issues. They create a plan that works with the dog clicker training I suggest.
If you're not seeing progress, even with consistent training, seek professional help. They can provide tailored steps to ensure the dog's safety and well-being.
Advanced techniques: shaping, chaining, and the three D's
I want to help you move beyond the basics and create fluent behaviors. Advanced methods make complex cues easy for your dog. I share small, actionable steps for using these techniques in any session.
Slice thin: breaking goals into tiny successful steps
I break goals into tiny steps and reward the smallest progress. This "slice thin" approach keeps reinforcement rates high and lowers frustration. For example, I reward a tiny rear-paw shift before asking for a full pivot.
I recommend documenting each micro-step in a training log. This makes it easy to see what earned clicks and when to raise criteria.
Distractions, Duration, and Distance—how to progress criteria
I treat the Three D's as separate training dimensions. I build each one alone so the dog learns reliability under one type of challenge at a time.
Start by adding mild distractions in a controlled way. Once the dog stays steady, work on duration by increasing hold time in small increments. After duration is solid, add distance and back away in short, repeatable steps.
When each D is reliable, I combine them slowly. This preserves clarity and keeps the dog confident during progression.
Chaining behaviors to build complex cues
I link simple, well-trained behaviors into a smooth sequence using chaining. Each link becomes a clear target to click and reward until the whole chain flows.
I choose forward or backward chaining based on the task. For instance, I use backward chaining for sequences where the final action is most motivating. I keep criteria clear and reinforcement high while the chain forms.
I often watch a short dog clicker training video to refine timing and see how other trainers slice goals. Using a dog clicker training guide helps me set steps and avoid common errors. My approach uses consistent clicks, clear criteria, and patient shaping to build complex cues that last.
Reinforcement strategies and managing rewards
I keep training simple and effective. I have clear rules for when to use rewards. This helps my dog learn quickly. I also balance rewards with health by using different types.
I rank rewards from lowest to highest. Kibble is at the bottom. Cheese and chicken are near the top. A favorite toy is the best for hard tasks. I change up the rewards to keep things interesting.
Ranking reinforcers from low to high value
I sort treats by value and when to use them. For easy tasks, I use kibble. For harder ones, I switch to chicken or cheese. For big achievements, I give out a favorite toy.
High rates of reinforcement and how often to click-treat
When my dog is learning, I use lots of rewards. This means 10–20 treats per minute for simple tasks. For walking on a leash, I reward every few steps at first.
As my dog gets better, I give fewer rewards. I use a mix of rewards and longer waits to make them reliable. This helps them learn to work without treats for a long time.
Non-food rewards and preventing weight gain during training
I use small treats to keep calories low. I give tiny kibble and meat bits. For dogs not interested in food, I use toys or play as rewards.
I watch my dog's weight closely and adjust their food if needed. Short training sessions help avoid overeating. Mixing toys with treats keeps them motivated without harming their health.
| Reinforcer | Typical Use | Calorie Tip |
|---|---|---|
| Kibble | Warm-up, high-rate repetition | Use pinhead pieces; count into daily ration |
| Cheese or cooked chicken | New behaviors, raised criteria | Pea-sized portions; limit frequency |
| Favorite toy (ball, tug) | High-value reward for big wins | Use short play bursts to keep sessions dense |
| Praise and petting | Maintenance, low-effort cues | No calories; pair with occasional treat to sustain value |
| Life rewards (door access, walks) | Real-world reinforcement for reliable cues | Replace a treat with access to the desired activity |
Overcoming plateaus and troubleshooting common problems
I often hit a wall in training where progress slows or stops. When that happens, I turn to a simple routine that helps me diagnose the issue without blame. Short checks of timing, environment, and reinforcers usually point me to small, fixable errors in my handling.
Filming a few sessions gives me a clear view of what I miss while I’m working. A dog clicker training video reveals split-second timing mistakes, inadvertent body cues, and distractions in the room. Watching playback makes it easier to correct click placement and reward delivery.
I look for signs that my dog is confused. Hesitation, inconsistent responses, or offering the wrong behavior tell me I’ve made steps too hard. When that happens I simplify the task. I break the behavior into smaller parts, reduce distractions, and reward tiny wins to rebuild clarity.
Adjusting pace helps when motivation dips. I shorten sessions to 30–60 seconds with frequent breaks. I change the reinforcer type if needed, moving to higher-value treats or using play for variety. I also tweak the antecedent setup so prompts are cleaner and less noisy.
Every change goes into a short journal or in the footage itself. Tracking which adjustments improve performance makes future troubleshooting faster. For beginners, dog clicker training for beginners becomes less intimidating when you use video, small steps, and simple records to guide progress.
When I share examples, I recommend watching a mix of short clips and full-session videos to spot patterns. A steady practice of filming, simplifying criteria, and adjusting session length keeps dog clicker training moving forward and reduces frustrating plateaus.
Using videos and resources to improve your technique
I use videos and resources to get better at dog clicker training. Short clips help me focus on timing, body language, and rewards. Before watching, I make sure my browser allows JavaScript and that any ad blocker is paused so the video will play smoothly.
What to watch for in practice footage:
- Clear timing: the click must mark the precise moment of the behavior.
- Reward speed: treats should follow the click quickly to link action and reward.
- Handler posture: calm, minimal movement that cues the dog unintentionally.
- Session length: short bursts keep the dog engaged and prevent fatigue.
- Reinforcer choice: varied values for different difficulty levels.
- Micro-steps: how the trainer slices complex behaviors into tiny successes.
- Antecedent setup: how distractions are removed or managed for clear learning.
How I film for useful self-review:
- Use a tripod or steady surface so the frame stays consistent.
- Record at an angle that captures both my body and my dog’s full posture.
- Keep lighting bright and reduce background noise so the click is audible.
- Film short training bursts, then stop and reflect between takes.
- Label files with date, goal, and reinforcer used for easy retrieval later.
Continuing education and professionals I trust:
- Karen Pryor Academy (KPA) courses for structured, science-based instruction.
- Certified Professional Dog Trainers (CPDT) workshops for applied skills.
- Veterinary behaviorists when clinical or reactive issues require diagnosis.
- Local positive-reinforcement trainers who welcome filmed session reviews.
- Reputable online courses that offer feedback and demonstrated techniques.
I keep a personal dog clicker training guide from trusted clips and live session notes. When I need feedback, I share dated clips with an instructor for targeted advice. This helps me improve timing, adjust rewards, and break down complex goals into reliable steps.
Conclusion
I aim to make this dog clicker training guide easy to follow. First, ensure you can access the recommended online resources. This means enabling JavaScript, trying another browser, or disabling ad blockers temporarily. This will help videos and demos load smoothly.
The basic idea is simple. Dog clicker training uses a precise sound to mark the exact moment a dog does the right thing. This is followed by a reward. Timing, reward value, and consistency are key. Over time, you can stop using the clicker while keeping treats and praise to maintain the behavior.
To see lasting progress, set up for success: remove distractions, keep sessions short and fun, film practice, and keep a journal. Rank your rewards and use the highest-value ones for harder steps. Break behaviors into tiny pieces and use the Three D’s—Distractions, Duration, and Distance—to advance criteria. If you face severe behavior problems, seek a certified behavior professional.
Practice thoughtfully, review your sessions, and enjoy the bond that grows from patient work. Whether you're starting or refreshing your knowledge, steady small steps will lead to big results.