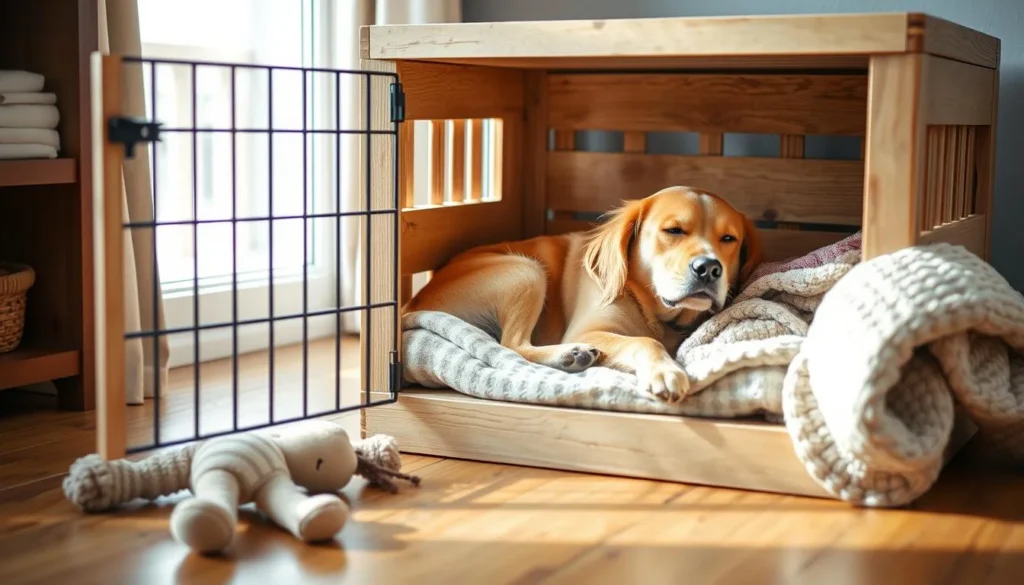
I remember the first time a shelter volunteer gave me a simple looped leash. They said, "Try this." My rescue dog was nervous, but the leash quickly calmed us down. It was amazing how it worked without a big harness or lots of hardware.
A slip lead is a handy tool that combines a collar and leash. It's often made of nylon or rope, like the Mighty Paw Slip Rope Leash. Trainers and vets love it because it's easy to use and gives clear feedback. But, it's important to use it correctly.
I'll share tips on how to use a slip lead safely and effectively. We'll talk about how it works, why a stopper is important, and how to pick a durable one. My goal is to help you use this simple tool with confidence and care.
Key Takeaways
- A slip lead is a combined collar-and-leash tool that’s quick to use for handling and training.
- Choose a durable material and a model with a stopper to improve safety.
- Slip lead training tips focus on timing, gentle corrections, and consistent releases.
- Slip lead safety tips include correct placement on the neck and monitoring for discomfort.
- Used properly, a slip lead offers fast control for vets, shelters, and everyday training.
What is a slip lead and why trainers use it
I explain the basics so you can see why trainers reach for this tool. A slip lead is a single piece of rope or webbing that forms a collar loop and a leash in one. It gives fast control, quick application, and clear cues when used with care. I use plain language to describe parts, action, and where pros rely on it.
Definition and components
The leash has no separate collar. A stopper keeps the loop from opening too wide. Common materials include climber’s rope, nylon, and polyester. Some models add reflective stitching or a small handle loop for grip. The simple design explains why many handlers pack one for visits to shelters, shows, or clinics.
How a slip lead works mechanically
The loop slips over the dog’s head and tightens when tension is applied. Tightening scales with the pull, so the dog feels an immediate cue. Letting up on pressure loosens the loop and signals release. Proper sizing and placement affect how pressure spreads across the neck and how quickly the cue registers.
Where you commonly see slip leads
Veterinary clinics, animal shelters, and dog shows often use slip leads for speed and control. Professional trainers use them in classes to address pulling and to teach quick handling during short sessions. I notice handlers favor slip lead for leash training when they need a tool that combines a collar and leash in one.
I emphasize safety and education over force. Learning the proper use of slip leads for dogs prevents misuse and reduces risk. When choosing between options, consider slip lead vs traditional leash based on the dog’s size, temperament, and the training goal.
how to use a slip lead for dog training
I explain how to fit a slip lead to keep both handlers and dogs safe and comfy. It's easy to follow, whether you're working with a Labrador, Beagle, or rescue. This guide covers where to place the loop, how to position the neck, and locking the stopper for control during training.

Putting the loop over the head correctly
I make the loop big enough to slide over the dog's head easily. Then, I hold the lead in a way that forms a P shape when walking on my left or an inverted P on my right. This makes it easy to hold and correct the dog quickly.
I slide the loop over the dog's head gently, keeping my hand low. This helps the dog stay calm and not feel scared.
Correct placement on the neck
I put the loop high on the neck, just behind the ears. This spot controls the dog's shoulders and body well without hurting the windpipe. I avoid low positions that could gag or hurt the dog.
If the dog resists, I pause, speak softly, and try again. This helps the dog accept the lead without stress.
Adjusting and securing the stopper
I adjust the stopper to make a snug loop that's still comfortable. There should be room for one to two fingers between the loop and the neck. This keeps the dog safe while allowing some movement.
If the stopper slides down too much, I check if I'm pulling too hard. I focus on loose-leash walking. I never leave a dog alone in a slip lead. I choose the right lead and stopper for the dog's size and strength for safety.
I use short training sessions and positive rewards. Showing the right way to use a slip lead helps dogs learn fast and keeps us both safe.
Slip lead training tips for stopping pulling
I prefer straightforward methods for teaching dogs to stop pulling. Begin in a quiet place and keep training brief. Use a slip lead effectively by timing, staying calm, and rewarding clearly. Practice every day and be patient.
It's important not to pull too hard on the leash. Hard pulling can make the dog pull back even more. Try to keep the leash loose most of the time. Only let the dog move forward when there's no tension.
Start with basic loose-leash training in a quiet area. If the dog starts to pull, stop and wait for the leash to go slack. When it does, praise and take a step forward. These short walks help the dog focus quickly.
Loose-leash walking basics
Use simple cues to get the dog's attention. A quick name call or a short command works well. Reward the dog the moment they focus again. The release of the leash is a reward in itself. As you stop using treats, keep rewarding with praise.
Directional changes and body language
Movement helps guide the dog's behavior. If they pull, give a brief tug and turn in the opposite direction. Say a clear command like “This way” to guide them. Turning often during early training teaches them to follow you.
Timing corrections and releases
Timing is more important than force. A quick correction followed by release teaches faster than long pulls. Reward the dog immediately with praise or a treat. Short, consistent training builds good habits.
Keep track of progress by training often and in short sessions. Train in the yard, a quiet park, or a long hallway. Be consistent with your cues and body language. Over time, the dog will learn that a loose leash and attention lead to movement and rewards.
Proper use of slip leads for dogs: safety precautions
I want every walk to be safe and clear. Slip lead safety tips help me decide when to use a slip lead and when to choose an alternative. Below I cover who should avoid them, common mistakes I see, and what to watch for during use.

Dogs that may not be appropriate candidates
Some dogs are not suited for slip leads because of medical or anatomical issues. Brachycephalic breeds like French Bulldogs and Boston Terriers often have sensitive airways that can worsen with neck pressure. Dogs with known tracheal collapse, neck injuries, or chronic coughing should avoid slip leads.
Very strong pullers with no training history may harm themselves before learning impulse control. For those dogs, I recommend using a front-clip harness or head halter until basic control improves. These alternatives reduce risk while training progresses.
Common mistakes to avoid
Placing the loop too low over the trachea causes choking and coughing. I always position the loop high behind the ears, not on the throat. Keeping constant tension is another frequent error. A slip lead works best with short, clear cues and immediate release after the correction.
Using a slip lead as a head collar that rubs the muzzle can cause chafing and resistance. Over-tightening the loop or leaving a dog unattended while wearing a slip lead risks injury. I avoid inconsistent corrections because they confuse the dog and prolong training problems.
Monitoring for signs of discomfort or injury
I watch closely for coughing, gagging, redness, hair loss, or abrasions along the neck. These signs mean I must stop using the slip lead and seek veterinary advice or consult a skilled trainer. Subtle anxiety signals like lip licking, yawning, or freezing also prompt me to pause and reassess the method.
Choosing a properly sized rope helps distribute pressure. A wider, cylindrical rope around 10mm reduces the chance of bald spots and skin damage. If any sign of injury appears, I discontinue use immediately and get professional help.
| Concern | What I check | Action I take |
|---|---|---|
| Respiratory sensitivity | Breed type, coughing, shortness of breath | Avoid slip lead; use harness or consult vet |
| Neck or tracheal issues | History of collapse, surgery, chronic cough | Choose alternative tool; get medical clearance |
| Pulling strength | Intensity and frequency of pulling | Build impulse control with harness before slip lead |
| Fit and material | Rope width, stopper placement, loop position | Use ~10mm rope, set stopper, place loop high |
| Skin and behavior signs | Redness, abrasions, hair loss, anxiety cues | Stop use, consult vet or trainer immediately |
Choosing the right slip lead: materials, length, and features
I help trainers and owners find the best gear for their dogs and training style. The right slip lead depends on materials, length, and features that fit your routine.
Material comparison
I compare common materials to help you choose. Rope is soft and spreads pressure, reducing chafing. Nylon and polyester are light and water-resistant, perfect for rainy days. Leather is classic and durable with regular care.
Consider your dog's coat and skin when picking material. Rope is good for active dogs. Nylon or polyester are great for everyday use. Leather offers durability and a stylish look, but needs more care.
Length and thickness recommendations by size
I suggest standard lengths for control without limiting exploration. Trainers often prefer 4' to 6' lengths. A 4' lead is tight in crowded areas, while a 6' lead offers more freedom.
Choose thickness based on your dog's strength and sensitivity. A 10mm rope is suitable for medium and large dogs. Smaller breeds need lighter, thinner options. Thicker diameters help distribute pressure for strong pullers.
Helpful features to look for
I look for slip lead features that add safety and ease. Reliable stoppers and reflective stitching improve visibility. Mighty Paw offers bright colors for dusk walks.
Comfort features are important. A loop handle reduces hand strain. Large rings and reinforced attachments prevent escapes. Extra clips allow for double-dog walking or harness use. Durability and weather resistance are key for all seasons.
| Feature | Best for | Benefit |
|---|---|---|
| Climber’s rope (10mm) | Medium & large dogs | Even pressure distribution, reduced chafing |
| Nylon / Polyester | Everyday use | Lightweight, quick-drying, low maintenance |
| Leather | Owners wanting durability and style | Long-lasting with proper care |
| Rubber or Kydex stopper | All sizes | Secure loop sizing and easy adjustment |
| Reflective stitching / bright colors | Night walks, urban areas | Improved visibility and safety |
| Large sliding rings & extra clips | Escape-prone dogs, multi-dog walks | Higher security and versatility |
When picking a slip lead, balance feel, control, and practical features. Use the material comparison and match length and thickness to your dog’s size. Choose features that make walks safer and training easier for both of you.
Slip lead vs traditional leash: pros and cons
I compare slip leads and traditional leashes to help you pick the best for your dog. I look at real-world use, safety, and how they match training goals.

Advantages of slip leads in dog training
Slip leads are great for quick on/off and minimal gear. They're favorites among trainers, vets, and shelter staff for their speed.
They offer quick feedback during corrections and combine collar and leash. This makes training short, focused, and affordable.
When a traditional leash or harness is better
Some dogs need different options. I suggest a harness for dogs with neck or breathing issues, chronic pullers, and nervous puppies.
For long walks, a standard leash or harness is better. A flat collar with ID tags is still good for identification, while a harness keeps your dog comfortable and safe.
How to combine tools safely
Pairing a slip lead with a walking harness is useful for visibility and control in short sessions. Use the slip lead briefly and never as a head collar.
Introduce new tools slowly and watch your dog's reaction. Switch to a harness or leash for longer walks to avoid neck strain.
Step-by-step slip lead technique demonstration
I'll show you a safe way to use a slip lead for dog training. Start by being calm and choose a quiet place. Keep the training sessions short. The goal is to make steady progress and handle the dog confidently, not to rush.
Prep and environment selection
I pick a quiet spot like my yard, a park corner, or a hallway. I bring small treats if my dog likes them. I choose a slip lead that fits my dog well and set the stopper for a snug fit.
I only put the loop over the dog's head when they're calm or not paying attention. This makes it easier and less stressful for the dog.
Live technique sequence
I place the loop correctly for the walking side. I put it high behind the ears and adjust the stopper. This way, the loop won't get too tight.
When the dog pulls, I give a quick tug, call their name, and change direction. I stop pulling right away if they listen. I praise or give a treat to reward them.
Progressing training sessions
I start with short, daily sessions. When the dog responds well, I add distractions and move to busier places. I use treats less often to make the dog more reliable.
For dogs that pull a lot, I add impulse-control drills and basic commands. I only give more leash freedom when they focus better.
Using slip lead for obedience training beyond walking
I use a slip lead to teach more than just walking. It helps me teach sit, stay, come, and check-ins. A light touch on the lead tells the dog to focus and respond quickly.
Teaching sit, stay, come, and check-ins with a slip lead
I start in a quiet place to teach these cues. For sit, I gently lift the lead to guide the dog. When they sit, I praise them and give a treat.
To teach stay, I apply gentle pressure and step back. If they stay, I reward them. If they move, I try again with a shorter hold.
For recall, I use a clear cue and reward them for coming back fast. Check-ins are quick and rewarded with a look-up cue. This trains them to focus.
Transitioning leash cues to off-leash reliability
I start with check-ins and recall on-leash in quiet spots. As they get better, I add distractions and increase distance. Each success gets a reward, then I use voice or signals.
I aim to use verbal cues instead of the leash. I use treats less and praise more to keep them motivated.
Incorporating positive reinforcement
I always reward them when they do something right. Early on, treats help them learn fast. Later, I use praise and play.
Training feels like a team effort with praise and clear releases. I focus on rewarding good behavior, not punishing mistakes.
| Skill | Slip Lead Cue | Initial Reward | Fade Plan |
|---|---|---|---|
| Sit | Short upward lift at stop point | High-value treat + praise | Move to praise, intermittent treats |
| Stay | Light steady tension, step back one pace | Release + treat after short hold | Increase duration, use praise only |
| Come (Recall) | Gentle tug then encourage toward handler | Big reward and play | Replace tug with voice cue, intermittent rewards |
| Check-ins | Quick pressure-and-release to prompt attention | Praise and brief treat | Shift to clicker or verbal marker, reduce food |
Slip lead dog walking techniques for everyday outings
I walk many dogs in my neighborhood. I use simple, effective methods to keep them calm and safe. I focus on short walks that teach them to pay attention and walk well.
I start each walk with basic loose-leash training in a quiet spot. I teach them to follow directions and respond quickly to cues. When they look at me, I let go of the lead right away.
I then gradually add more distractions. I move from quiet streets to parks with lots of people and bikes. I keep the walks short and praise them a lot. This helps them learn without getting overwhelmed.
Managing distractions and public spaces
I use special cues and quick corrections, then let them go right away. At first, I keep walks short and focus on getting their attention. If they get excited, I change direction and reward them for calming down.
In dark areas, I use reflective gear and a clear voice. I avoid busy times for early training. This helps them learn to respond consistently without getting stressed.
Handling multiple dogs or escapes
When walking multiple dogs, I use a mix of tools. One dog is on a harness, the other on a slip lead. This gives me more control without too much pressure.
I use special rings or clips for quick changes. In emergencies, a well-fitted slip lead is crucial. I keep one hand free and manage extra slack for sudden pulls.
Maintenance and storage
I clean my slip leads after muddy walks and let them dry indoors. Before each walk, I check for damage. If something's wrong, I replace it to keep everything working right.
I store my leads in a cool, dark place to prevent damage. I use reflective stitching and bright colors for safety at dusk. Regular checks help keep my gear in top shape.
Conclusion
I discovered that a slip lead is a simple yet powerful tool for dog training. By placing the loop high behind the ears, I set the stopper so one to two fingers fit. This way, I can teach my dog to walk politely and focus better.
Using a slip lead shows its advantages in real-world walks. My dog responds faster and cleaner compared to bulky alternatives. This makes training easier and more effective.
Safety is key in my training approach. I follow important safety tips for every session. I avoid using the slip lead on dogs with breathing problems and never leave them alone while wearing it.
I choose durable materials and the right length for my slip lead. Features like reflective stitching and a secure stopper are also important for safe evening walks.
Progress is important in training. I start in quiet places and add challenges slowly. I always pair corrections with positive reinforcement and patience. This helps my dog learn to follow commands even without a leash.
With consistent practice and careful attention to safety, I see the benefits of slip leads. They help me train a well-behaved walking companion.